Free Resource
How to Shoot Underwater Portraits
A practical starting point for photographers moving into the water: what to learn first, how to keep your subject safe, and the habits that separate a usable frame from a great one.
Start Before the Camera
Underwater portrait photography is a water skill before it is a camera skill. The photographers who struggle are almost never struggling with exposure — they are struggling with buoyancy, breath control and communication.
Get comfortable in the water first. Learn to hold a stable position at depth, to descend without kicking up silt, and to signal your subject without shouting. Everything else gets easier once that is automatic.
Safety Is Not Optional
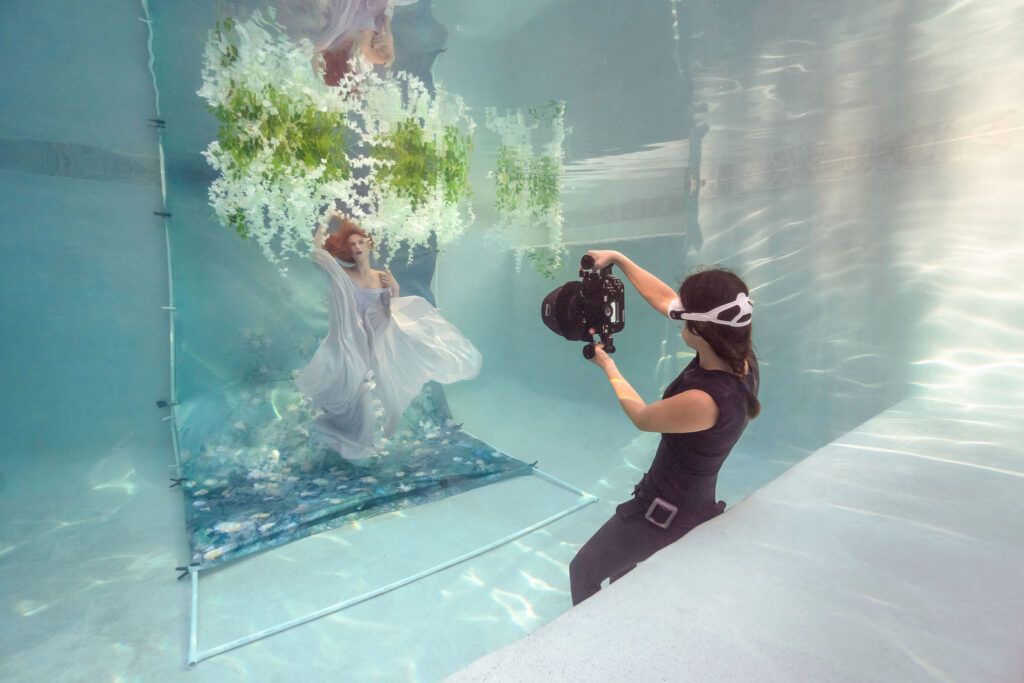
Every session needs a dedicated safety person whose only job is watching the subject — not assisting you, not holding fabric, not carrying gear. Shallow water hypoxia does not announce itself, and a model who is having trouble often looks calm right up until they are not.
Keep breath holds short and repeated instead of long. Rehearse each pose dry. Agree on a stop signal and honour it instantly, every time.
Gear: What You Actually Need First
You do not need the most expensive housing on the market to start. You need a housing you trust, a port that matches your lens, a wide-ish lens that lets you get close, and a disciplined pre-dive check routine.
Water is the densest filter you will ever shoot through, so distance destroys contrast and colour. The fix is almost always physical: get closer.
Working With Natural Light
In springs and pools, the sun is your key light and the surface is your modifier. Mid-morning and mid-afternoon give you angled shafts; overhead noon sun gives you flatter, brighter water.
Shoot slightly upward toward the surface for separation and glow, and downward toward the sand for clean, graphic frames. Learn what the water does at your location before you bring a client to it.
Posing and Directing Underwater
Underwater posing is exaggerated posing. Anything subtle disappears. Long lines, extended fingers, an arched back, a lifted chin — the poses that feel theatrical above water read as elegant below it.
Direct above water, execute below. Set the pose, describe it, rehearse it, then send them down for a few seconds. Repetition beats endurance every single time.
Editing the Underwater Frame
Underwater files need more work than dry ones. Expect to correct a heavy colour cast, recover contrast lost to water density, and clean up particulate in the water column.
Build a consistent starting point rather than treating each frame from scratch — that is where most of the editing time goes when photographers are new to this.
Where to Go Next
Reading gets you oriented; water time makes you a photographer. The fastest path is a structured course plus a hands-on workshop where you shoot with a model, a safety swimmer and feedback in real time.
Keep Going
Online Courses
Underwater photography courses covering safety, posing, lighting and editing.
Read more →The Water Workshop
Hands-on underwater portrait workshops with models and safety support.
Read more →The Three Pillars of Safety
The safety framework every underwater session should be built on.
Read more →